




































These buttermilk biscuits come together in 35 minutes with seven ingredients you likely already have. The method is straightforward — cold butter, cold buttermilk, minimal mixing — and it produces biscuits that are genuinely flaky inside with a golden crust. If you’ve never made biscuits from scratch, this is a good place to start.
What makes this version work
Two things drive the result here. First, keeping the butter cold the entire time — cold fat releases steam in the oven, and that steam is what creates the layers. If your kitchen is warm, pop the cubed butter back in the freezer for five minutes before you start. Second, the folding step. Patting the dough out and folding it two or three times builds distinct layers without overworking the gluten. Skip this step and you get a decent biscuit; do it and you get one that actually pulls apart in sheets. Skip the extra garnish beyond the buttermilk brush — flavored toppings before baking just burn at 425°F and aren’t worth the extra dish.
What can go wrong
- Biscuits spread flat instead of rising: Your baking powder may be old. Test it by dropping a teaspoon into hot water — if it doesn’t bubble actively, buy a fresh can. Leavening that’s even a few months past its best-by date loses significant lift.
- Dough is sticky and unworkable: Buttermilk brands vary in thickness. If the dough is too wet to handle, add flour one tablespoon at a time to the surface and work it in gently — don’t dump extra flour directly into the bowl or you’ll throw off the ratio.
- Biscuits are tough and dense: This almost always means the dough was mixed or kneaded too long after the buttermilk went in. Once the liquid is added, switch to a light hand. Stop mixing the moment no dry flour is visible.
- Bottoms burn before the tops brown: A thin or dark-colored baking sheet absorbs too much heat. If that’s what you have, double up two sheets stacked together, or move the rack up one position in your oven.
- Cut biscuits don’t rise evenly: Twisting the cutter seals the edges and prevents a clean rise. Press straight down and lift straight up — no rotation at all.
Storage and reheating
Biscuits are best the day they’re baked, but they keep well at room temperature in an airtight container for up to two days. After that, move them to the fridge where they’ll last another two days, though the texture gets a little denser. For longer storage, freeze fully baked biscuits in a zip-top bag for up to two months — freeze them in a single layer first, then bag them once solid so they don’t stick together. To reheat from room temperature, wrap in foil and warm in a 350°F oven for about eight minutes. From frozen, go straight into a 350°F oven wrapped in foil for 15 to 18 minutes. The microwave works in a pinch — 20 to 30 seconds on medium power — but the crust softens. You can also freeze unbaked cut biscuits on a sheet, then bake them straight from frozen at 425°F, adding about five extra minutes to the bake time.
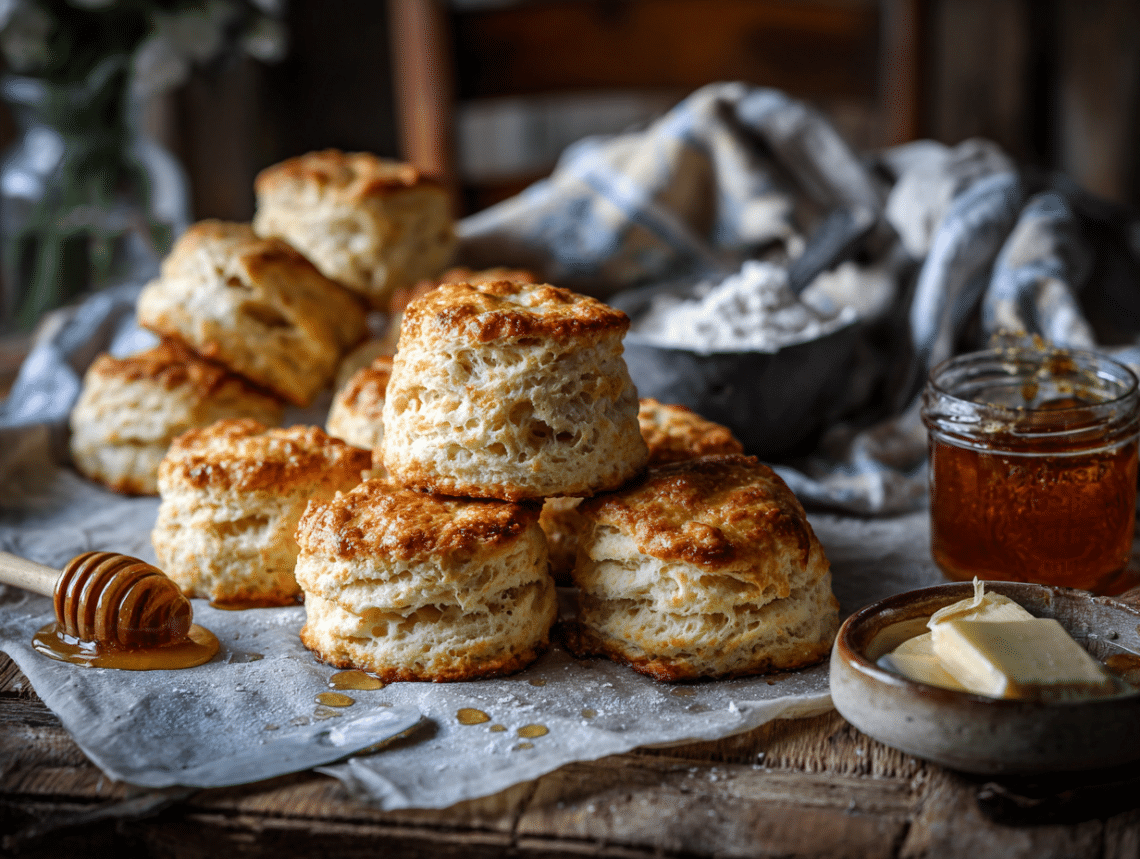
Easy Flaky Buttermilk Biscuits
Equipment
- Mixing bowl
- Pastry cutter (or two knives or a food processor)
- Baking sheet
- Parchment paper
- Pastry brush
- Oven
Ingredients
- 2 cups all-purpose flour preferably unbleached for a more classic texture
- 1 tablespoon baking powder aluminum-free preferred for cleaner taste
- ½ teaspoon baking soda
- 1 teaspoon kosher salt adjust to taste
- 6 tablespoons unsalted butter cold and cubed
- ¾ cup buttermilk very cold, plus 1 tablespoon extra for brushing
Instructions
- Preheat your oven to 425°F (220°C). Line a baking sheet with parchment paper for even baking and easy cleanup.
- In a large mixing bowl, whisk together the all-purpose flour, baking powder, baking soda, and kosher salt until uniformly combined.
- Add in the cold, cubed unsalted butter. Using a pastry cutter, two knives, or your fingers, cut the butter into the flour until the mixture resembles coarse breadcrumbs with pea-sized bits of butter. Visible butter chunks yield flakier layers.
- Create a well in the center of the flour mixture and pour in the cold buttermilk. Mix gently with a fork or rubber spatula just until incorporated. Do not overmix—this keeps the dough tender.
- Turn the dough out onto a lightly floured surface. Pat it gently into a rectangle about 1 inch thick. Fold the dough in half, rotate it 90 degrees, and gently pat it out again. Repeat the fold 2–3 more times to build layers.
- After the final fold, pat the dough into a 3/4- to 1-inch thick rectangle. Using a round biscuit cutter (2 to 2.5 inches), cut out biscuits, pressing straight down without twisting. Gather and re-pat scraps gently to get more biscuits.
- Place biscuits on the prepared sheet, close together for softer sides or spaced apart for crispier sides. Brush the tops lightly with reserved buttermilk for a golden finish.
- Bake for 15 minutes or until the tops are golden and the biscuits have risen beautifully. Serve warm.
Notes
- If you don’t have buttermilk, mix 3/4 cup milk with 2 teaspoons lemon juice or white vinegar. Let sit 5–10 minutes before using.
- Freeze the cut butter for 10–15 minutes prior to mixing if your kitchen is warm.
- To make the biscuits ahead, cut and freeze them raw. Bake from frozen, adding 2–3 extra minutes.
Nutrition
FAQ
Can I use regular milk instead of buttermilk?
You can make a quick substitute: add one tablespoon of white vinegar or lemon juice to a measuring cup, then fill to the ¾-cup line with whole milk and let it sit for five minutes. It won’t be identical to real buttermilk, but the acid activates the baking soda and the biscuits will still rise and taste good.
Do I really need a biscuit cutter, or can I use something else?
A sharp-rimmed glass or a straight-sided cookie cutter works fine. The key is that the edge is thin and clean — a thick or rounded rim will compress the dough edges and slow the rise.
My butter isn’t fully cold by the time I’m ready to use it. What should I do?
Put the cubed butter in the freezer for 10 minutes before you start. Cold butter is non-negotiable for flaky layers, so it’s worth the wait rather than pressing ahead with soft butter.
Can I make the dough ahead of time?
Yes — cut the biscuits out, place them on a parchment-lined sheet, cover tightly with plastic wrap, and refrigerate overnight. Bake them cold straight from the fridge the next morning, which actually helps the butter stay firm going into the oven.
Why does the recipe say not to twist the cutter? Does it really make a difference?
It does. Twisting pinches the cut edges together, which partially seals the layers and prevents the biscuit from rising straight up. A clean downward press keeps those edges open so the biscuit can push upward in the oven.
What to cook next
- Homemade Strawberry Jam
- Crispy Southern Fried Green Tomatoes
- Fluffy Homemade Pancake Mix
- Crispy Southern Hush Puppies