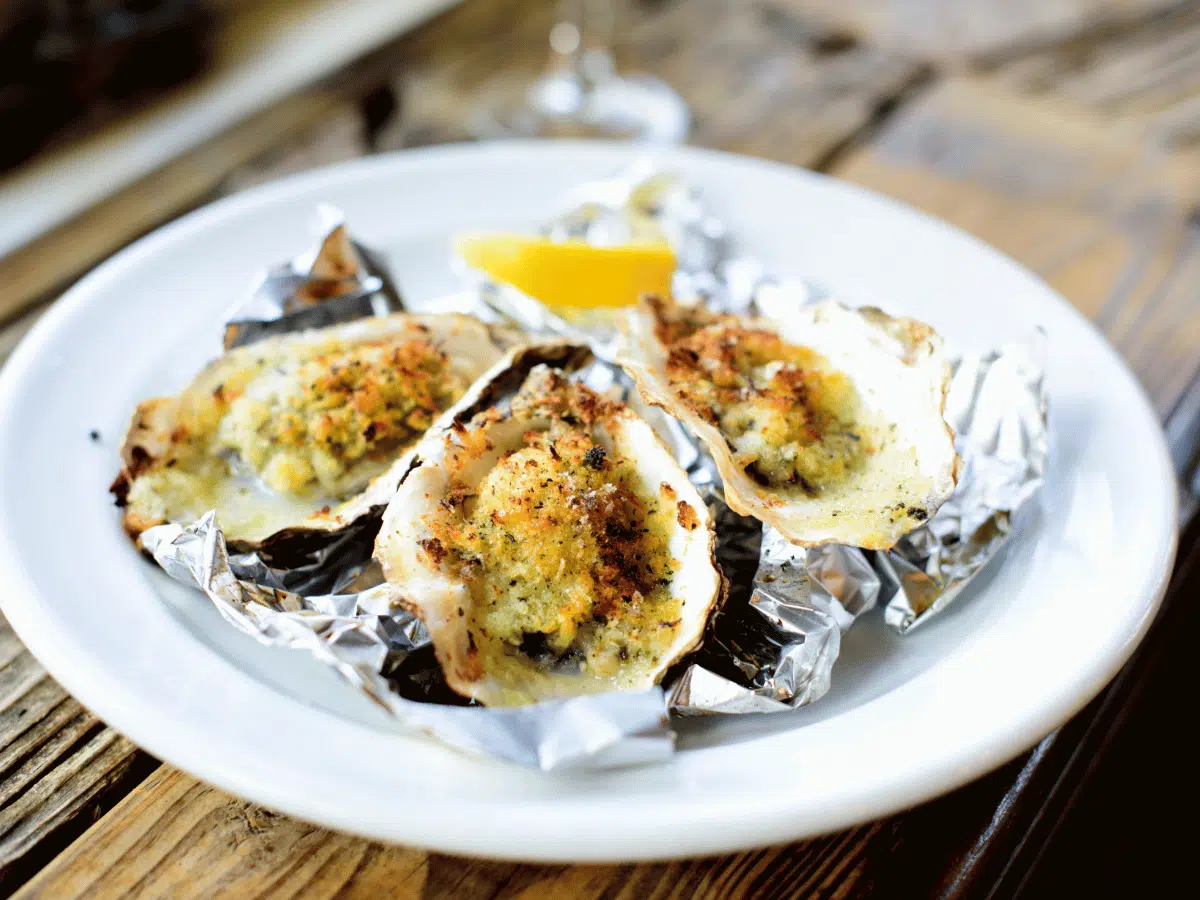


These are shucked oysters baked at 400°F with garlic butter and parsley, then finished with a squeeze of lemon. The honest reason to make them: the oven does most of the work, the ingredient list is short, and the result looks far more involved than it actually is — which makes this a smart choice when you want something impressive without a lot of cleanup.
The technique that matters
The only technique worth slowing down for here is how you arrange the oysters on the pan. Each shell needs to sit level so the butter pools inside the cup of the oyster rather than running off onto the baking sheet. If your oysters are wobbly, crumple a sheet of foil into a loose bed and nestle each shell into it before spooning on the butter. The second thing that matters is timing: pull them the moment the edges curl and the butter bubbles. An extra two minutes past that point and the oysters turn rubbery and lose most of their liquid — there is no recovering from that.
Mistakes to avoid
- Using oysters that are already open before you shuck them. A live oyster holds its shell tightly shut. If one is gaping and won’t close when tapped, discard it — it is not safe to eat cooked or raw.
- Rinsing the shucked oysters. It feels instinctive but it washes away the natural brine, which is a big part of the flavor. Pat the shell dry on the outside if needed, but leave the oyster and its liquor alone.
- Mincing the garlic too coarsely. Large chunks of raw garlic won’t soften fully in 8–10 minutes at this temperature. Mince it fine or use a microplane so it melts into the butter rather than sitting on top in sharp, half-cooked pieces.
- Skipping the foil lining on the baking sheet. Garlic butter burns onto a bare pan and is genuinely difficult to scrub off. Line the sheet — skip the garnish plating on a separate dish, not worth the extra dish — and cleanup takes thirty seconds.
- Letting the butter mixture sit too long before using it. If the melted butter cools and starts to solidify before you spoon it onto the oysters, it won’t distribute evenly. Mix and spoon immediately.
Keeping and reheating
Baked oysters are best eaten straight from the oven, but if you have leftovers, transfer them to an airtight container and refrigerate for up to 2 days — do not freeze them, as the texture becomes unpleasantly soft after thawing. To reheat, place them back in their shells on a foil-lined baking sheet and warm in a 350°F oven for 4–5 minutes, just until heated through. Avoid the microwave; it makes the oyster meat tough and steams out whatever liquid remains. Leftover baked oysters also work well chopped and stirred into scrambled eggs or tossed with pasta and a little extra butter — both are good ways to use them up without reheating them as-is.
Baked Fresh Oysters in Garlic Butter (Easy Recipe)
Equipment
- Rimmed baking sheet
- Aluminium foil (for stabilising shells)
- Oyster knife (if shucking your own)
- Small mixing bowl
- Kitchen towel or cut-resistant glove (for holding oysters while shucking)
- Teaspoon (for spooning butter into shells)
Ingredients
- 12 large oysters fresh, shucked on the half shell
- ¼ cup butter melted, 57g
- 2 cloves garlic minced
- 1 tablespoon fresh parsley finely chopped, 3g
- 1 medium lemon cut into wedges
- salt to taste
- freshly ground black pepper to taste
Instructions
- Preheat your oven to 400°F / 200°C (205°C fan-forced).
- Line a rimmed baking sheet with crumpled aluminium foil. Nestle each shucked oyster into the foil so the shells sit level and the butter won’t run out.12 large oysters
- In a small bowl, mix the melted butter, minced garlic, and chopped parsley until combined.1/4 cup butter, 2 cloves garlic, 1 tablespoon fresh parsley
- Spoon the garlic butter mixture evenly over each oyster, filling the cup of each shell.12 large oysters
- Bake for 8 to 10 minutes, or until the oyster edges begin to curl and the butter is bubbling. Do not overbake — the oysters will turn rubbery.12 large oysters
- Remove from the oven and season with salt and freshly ground black pepper to taste.salt, freshly ground black pepper
- Serve immediately with lemon wedges on the side.1 medium lemon
Notes
Nutrition
Your questions, answered
Can I use pre-shucked oysters from a jar or container?
Yes, jarred shucked oysters work fine for this recipe. Drain them well before use, then place each oyster in a small oven-safe dish or a foil cup since you won’t have the shells to hold them.
How do I know if a fresh oyster is safe to cook?
A live oyster should be tightly closed, or should close when you tap it firmly. Any oyster that stays open and doesn’t respond to tapping should be thrown out — this applies before shucking, not after.
Do I need to add anything to the baking sheet to keep the shells stable?
Crumpled aluminum foil works well as a base — press it into a rough layer and press each shell into it so it sits flat. A thin layer of coarse salt on the baking sheet is another common option that does the same job.
Can I make the garlic butter ahead of time?
You can mix it up to a day in advance and store it covered in the fridge. Warm it briefly in the microwave in 10-second bursts until just melted before spooning it onto the oysters — don’t let it get hot or it will start to separate.
What can I serve alongside these to make a fuller meal?
Crusty bread is the most practical option — it soaks up the garlic butter left in the shells. A simple green salad or a bowl of clam chowder rounds it out without competing with the oysters.
If you liked this one
- Creamy New England Clam Chowder
- Authentic Spanish Seafood Paella
- Fresh Lemon-Herb Crab Salad
- Rustic Sourdough Focaccia with Rosemary and Sea Salt