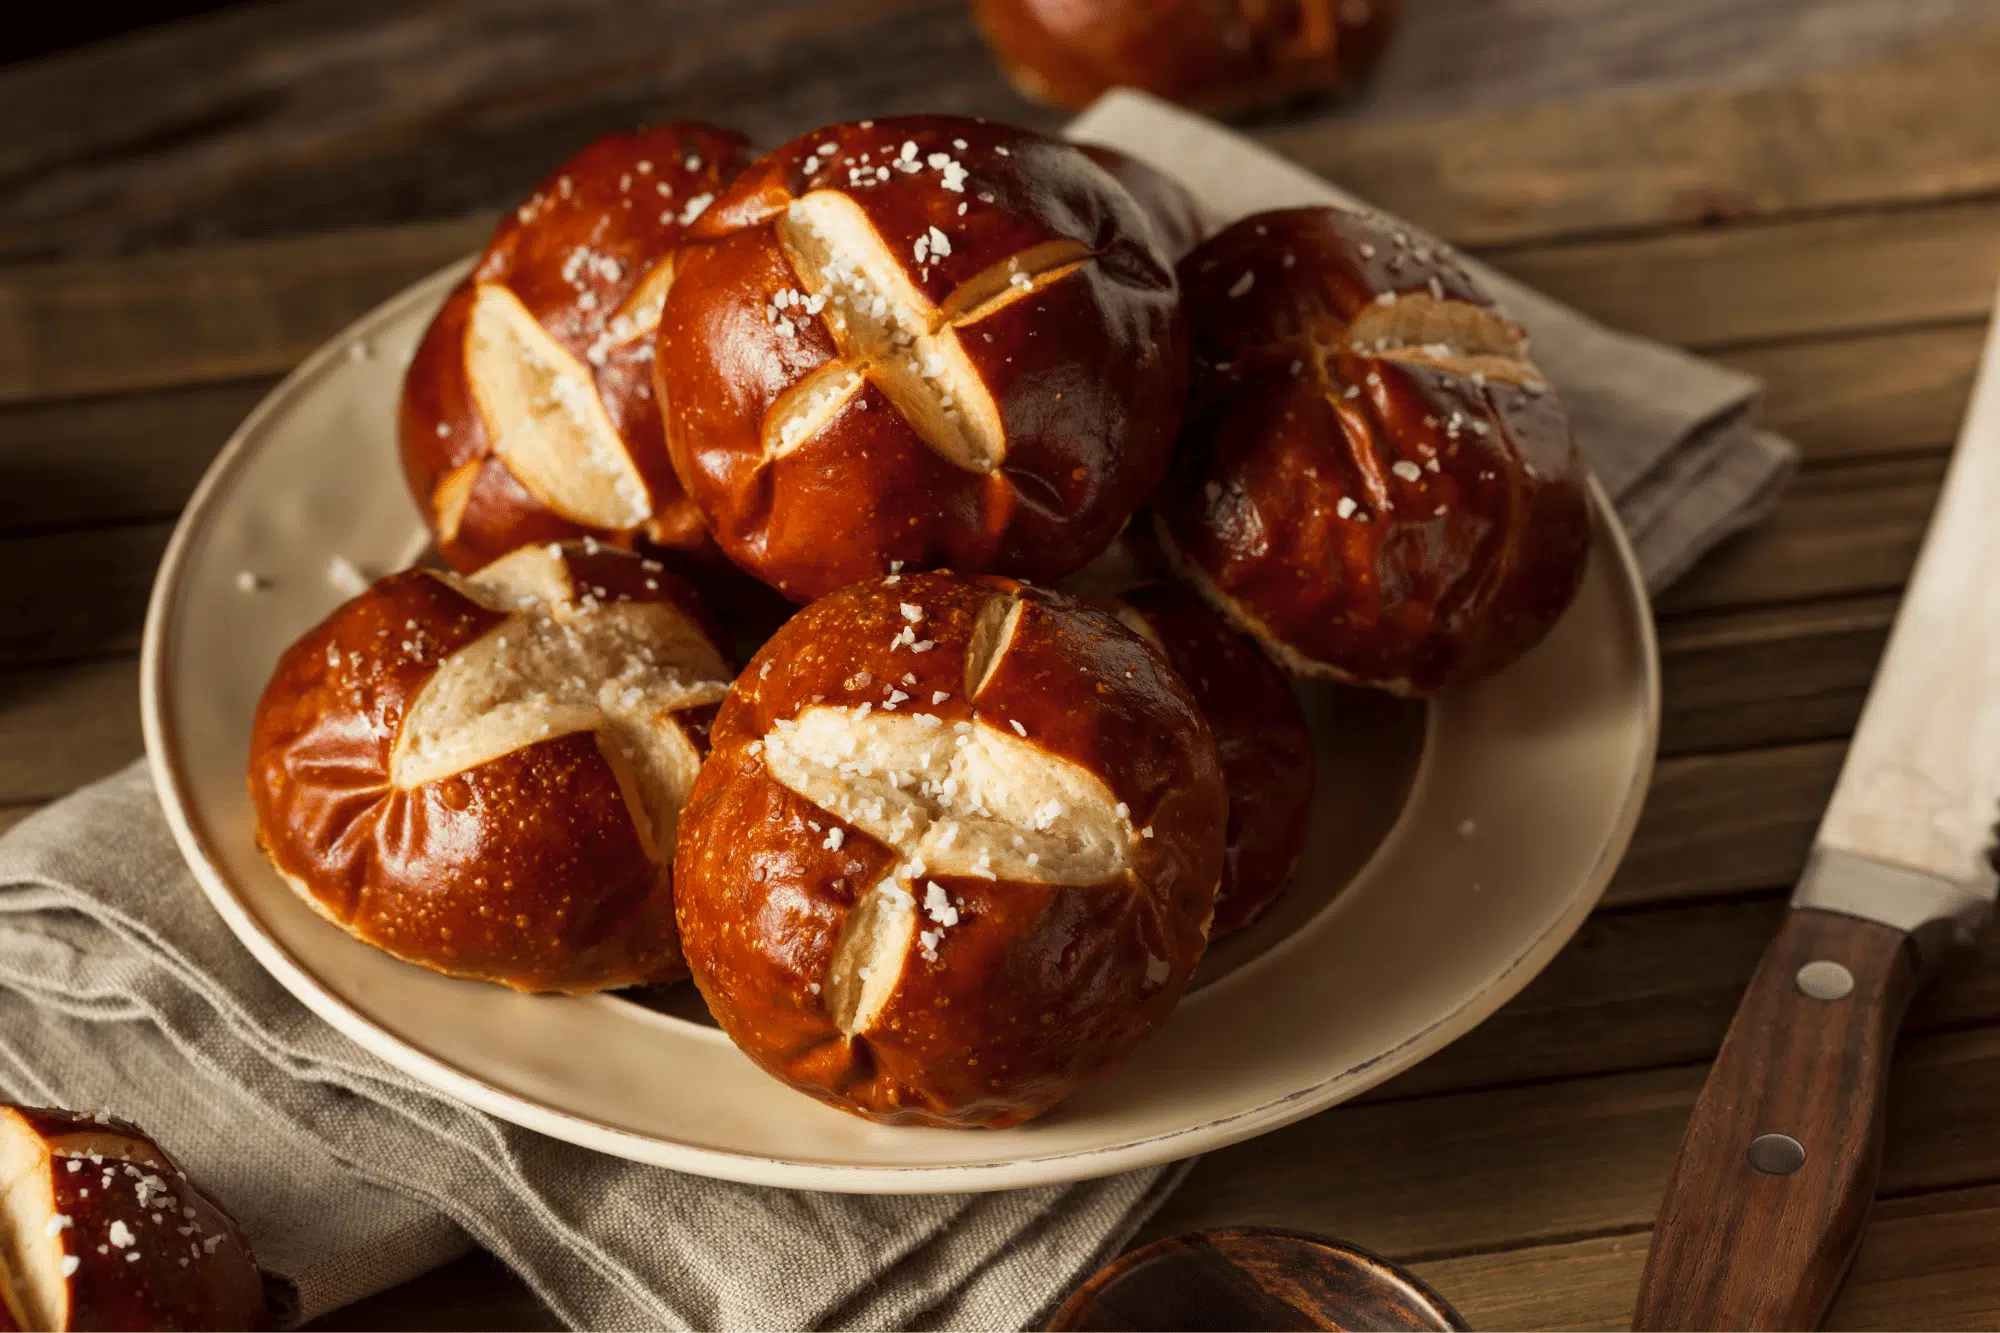

Pretzel rolls have a crust you can’t fake — that deep brown, slightly shiny shell with a satisfying chew comes from one specific step: a quick dip in boiling baking soda water before baking. This recipe uses a straightforward bread dough and that single technique to produce rolls that hold up to fillings, taste genuinely tangy, and come together in about 90 minutes start to finish. No special equipment beyond what most home kitchens already have.
Before you start
The baking soda bath is the one step you can’t skip or rush. It raises the pH on the surface of the dough, which causes rapid browning in the oven and sets that thin, chewy outer shell — neither an egg wash nor steam can replicate it. The other thing that matters is gluten development: knead until the dough genuinely passes the windowpane test (stretch a small piece thin enough to see light through without it tearing). Under-kneaded dough won’t hold its shape through the boiling bath and tends to flatten in the oven.
About the ingredients
- Bread flour: Don’t swap this for all-purpose. The higher protein content (12–14%) is what gives these rolls their chew and helps them survive the boiling bath without going slack. All-purpose dough tends to spread and lose structure.
- Baking soda (¾ cup for 3 quarts water): This is a large amount on purpose — it’s what makes the bath alkaline enough to work. Use regular supermarket baking soda; no need for food-grade lye, which is the traditional but harder-to-source alternative.
- Active dry yeast: Instant yeast works as a direct swap at the same quantity — skip the 5-minute bloom and add it straight to the flour.
- Coarse sea salt topping: Pretzel salt (large flat flakes) is ideal if you have it, but coarse sea salt does the job. Skip the garnish of any extra toppings like seeds — not worth the extra dish.
Mistakes to avoid
- Water too hot when blooming yeast: Above 110°F / 43°C kills active dry yeast. If your tap runs hot, check the temperature before adding the yeast — it should feel warm, not hot, on your wrist.
- Boiling too long: 30 seconds total (15 per side) is the ceiling. Longer than that and the crust becomes gummy rather than chewy, and the rolls can deflate slightly before they hit the oven.
- Crowding the pot: Boil one or two rolls at a time. They puff slightly in the water and need room to float freely — crowding causes them to stick together and tear the surface.
- Salting before draining: Add the coarse salt after the rolls are on the parchment, not while they’re wet over the pot. Salt applied to a dripping surface dissolves and disappears into the crust instead of staying on top.
- Under-browning: Pull these when they look darker than you think is right — a pale pretzel roll is an under-flavoured one. Deep mahogany is the target; if the rolls are golden after 12 minutes, give them the full 15.
Homemade German Pretzel Rolls
Equipment
- Stand mixer with dough hook
- Large stockpot (6-quart / 5.7L minimum)
- Slotted skimmer or spider strainer
- Half sheet pan (18x13 inch / 46x33cm)
- Parchment paper
- Kitchen scale
- Bench scraper
- Sharp paring knife or bread lame
Ingredients
- 1 ½ cups water warm (100–110°F / 38–43°C)
- 2 tablespoons light brown sugar
- 2 teaspoons active dry yeast
- 5 tablespoons unsalted butter melted
- 2 ½ teaspoons kosher salt
- 4 cups bread flour
- 1 teaspoon olive oil
- 3 quarts water for boiling bath
- ¾ cup baking soda
- 1 teaspoon coarse sea salt for topping
Instructions
- Place the first 4 ingredients in the bowl of a stand mixer fitted with the dough hook. Mix them on low using the dough hook for 10 to 15 seconds until everything is combined. Allow the mixture to stand for 5 minutes until it blooms (becomes foamy on top). Use the dough blade to do this in a food processor if you want.
- Meanwhile, in a separate bowl, mix the bread flour and salt. Add this mixture to the sugar/yeast mixture. Start the mixer on low to incorporate, then increase the speed and knead the dough on medium-high for 4 to 6 minutes until the dough pulls away from the sides of the bowl, forms a smooth ball, and remains on the dough hook. The dough should pass the windowpane test — you can stretch a small piece thin enough to see light through it without it tearing.
- Pour a small amount of olive oil in the bottom of a bowl to keep the dough from sticking. Add the dough to this bowl and drape a damp towel over the bowl. Allow the dough to proof in a warm, dry place until doubled in size, about one hour.
- Preheat your oven to 425°F / 220°C (200°C fan-forced). Line a half sheet pan with parchment paper.
- Fill a pot with water and baking soda and bring to a boil.
- Divide the dough into 8 equal-sized pieces (about 4 oz / 113g each). Roll each piece into a smooth ball, then press down slightly with your fingertips to form a round disc about 3 inches / 7.5cm across.
- Score an “x” on top of each roll with a sharp knife or bread lame, cutting about 1/4 inch / 6mm deep. Alternatively, use a Kaiser roll stamp for a traditional pattern.
- Place the rolls in the boiling water and boil for 15 seconds per side (30 seconds total). Remove them with a slotted skimmer or spatula and drain any excess water. Place on a parchment-lined baking sheet.
- Sprinkle lightly with coarse sea salt.
- Bake at 425°F / 220°C (200°C fan-forced) for 14 to 15 minutes until the rolls are deep mahogany brown and sound hollow when tapped on the bottom. Internal temperature should reach 200°F / 93°C.
Nutrition
Frequently asked questions
Can I make the dough the night before?
Yes — after shaping the rolls, place them on the parchment-lined pan, cover tightly with plastic wrap, and refrigerate overnight instead of doing the one-hour room-temperature proof. The next day, take them straight from the fridge to the boiling bath; no need to bring them to room temperature first.
Is baking soda water safe to boil with? It bubbles up a lot.
It’s safe, but use a pot that holds at least 6 quarts — the baking soda causes the water to foam vigorously when it first comes to a boil and when you add the rolls. A pot that’s too small will boil over quickly.
My rolls came out pale and soft, not dark and chewy. What went wrong?
The most likely cause is that the baking soda bath wasn’t alkaline enough — either the water wasn’t fully boiling, or the baking soda ratio was off. Measure the baking soda by weight if you can (about 180g for 3 quarts), and make sure the water is at a rolling boil before the rolls go in.
Can I freeze these after baking?
Yes, and they freeze well. Let them cool completely, then freeze in a zip-lock bag for up to 2 months. Reheat from frozen in a 375°F / 190°C oven for 10–12 minutes — this revives the crust better than a microwave, which makes it soft and chewy all the way through.
What to cook next
- Authentic New York-Style Bagels Made Simple at Home
- Rustic Sourdough Focaccia with Rosemary and Sea Salt
- Handmade Flour Tortillas Fresh from Your Home Kitchen
- Fluffy Cinnamoroll Milk Bread Cinnamon Rolls